
My fingernails are well cared for, but usually not painted in a dark color. For special occasions or PR appointments, I usually apply regular nail polish in a dark red-brown tone - mind you in three coats (base coat, color, top coat). Often the whole thing is a stressful last minute action (I have no idea why some things are always done at the last minute).
But I'm generally happy with the result. In any case, I always feel more comfortable and somehow more “complete” with painted fingernails. It is important to me that the paint definitely survives the occasion for which I brushed it on. I've already come to terms with the fact that it won't last longer than three days for me. Because my nail polish always chips off quite quickly in some corner.
That's ok. Of course I could go to the nail salon if I wanted lasting durability - I know. But I prefer an alternative for at home. I want to be flexible and not have deadline pressure.
That's why I've now tested the nail strips from Maniko. Briefly about the product: Maniko Nails are UV gel strips that can be stuck on. More precisely, they are thin, self-adhesive strips made of 100% real nail polish. The strips can be easily stuck on at home and the manicure should last up to three weeks at best.
I tested the Maniko Nails and this is my conclusion
“Maniko Nails” have been on the list of beauty products that I would like to try for a while now. But to be honest, I kept putting off the whole project. How come? Because I thought it wouldn't work anyway. Am I really comfortable with stick-on nails? Does it look neat in the end and is my work presentable?
Now I've finally made it and dared to test the Maniko Nails. And, be careful, I'm giving away spoilers, I'm thrilled.
What have I done? I followed the instructions meticulously and did everything step-by-step the way the brand explained it. The short summary is: First, I pushed back my cuticles with a manicure stick, cleaned my nails with the included alcohol pad, selected strips of the appropriate size and stuck them onto my nails.
The big question, of course, is: How did the gluing work? I really have to say: excellent. I didn't think it would work so well and, above all, so simply (even for me as a nail strip beginner).
As Maniko recommends, I carefully stretched the strips beforehand to fit my nail shape. It was easy and you don't have to worry about the strips tearing. I then cut off the protruding half and tried to leave enough left to fold the end under the tip of my nail so that the entire edge of the nail was covered.
Then I carefully filed. Admittedly, folding and filing was a bit tricky at first - but after a few nails I got the whole thing figured out.
To ensure that the gel strips hold really well, I finally used the silicone hoof stick from the starter set to press them firmly. The last step of the Maniko manicure is called “curing”. To do this, simply hold the glued nails under a UV lamp for a minute. Complete.
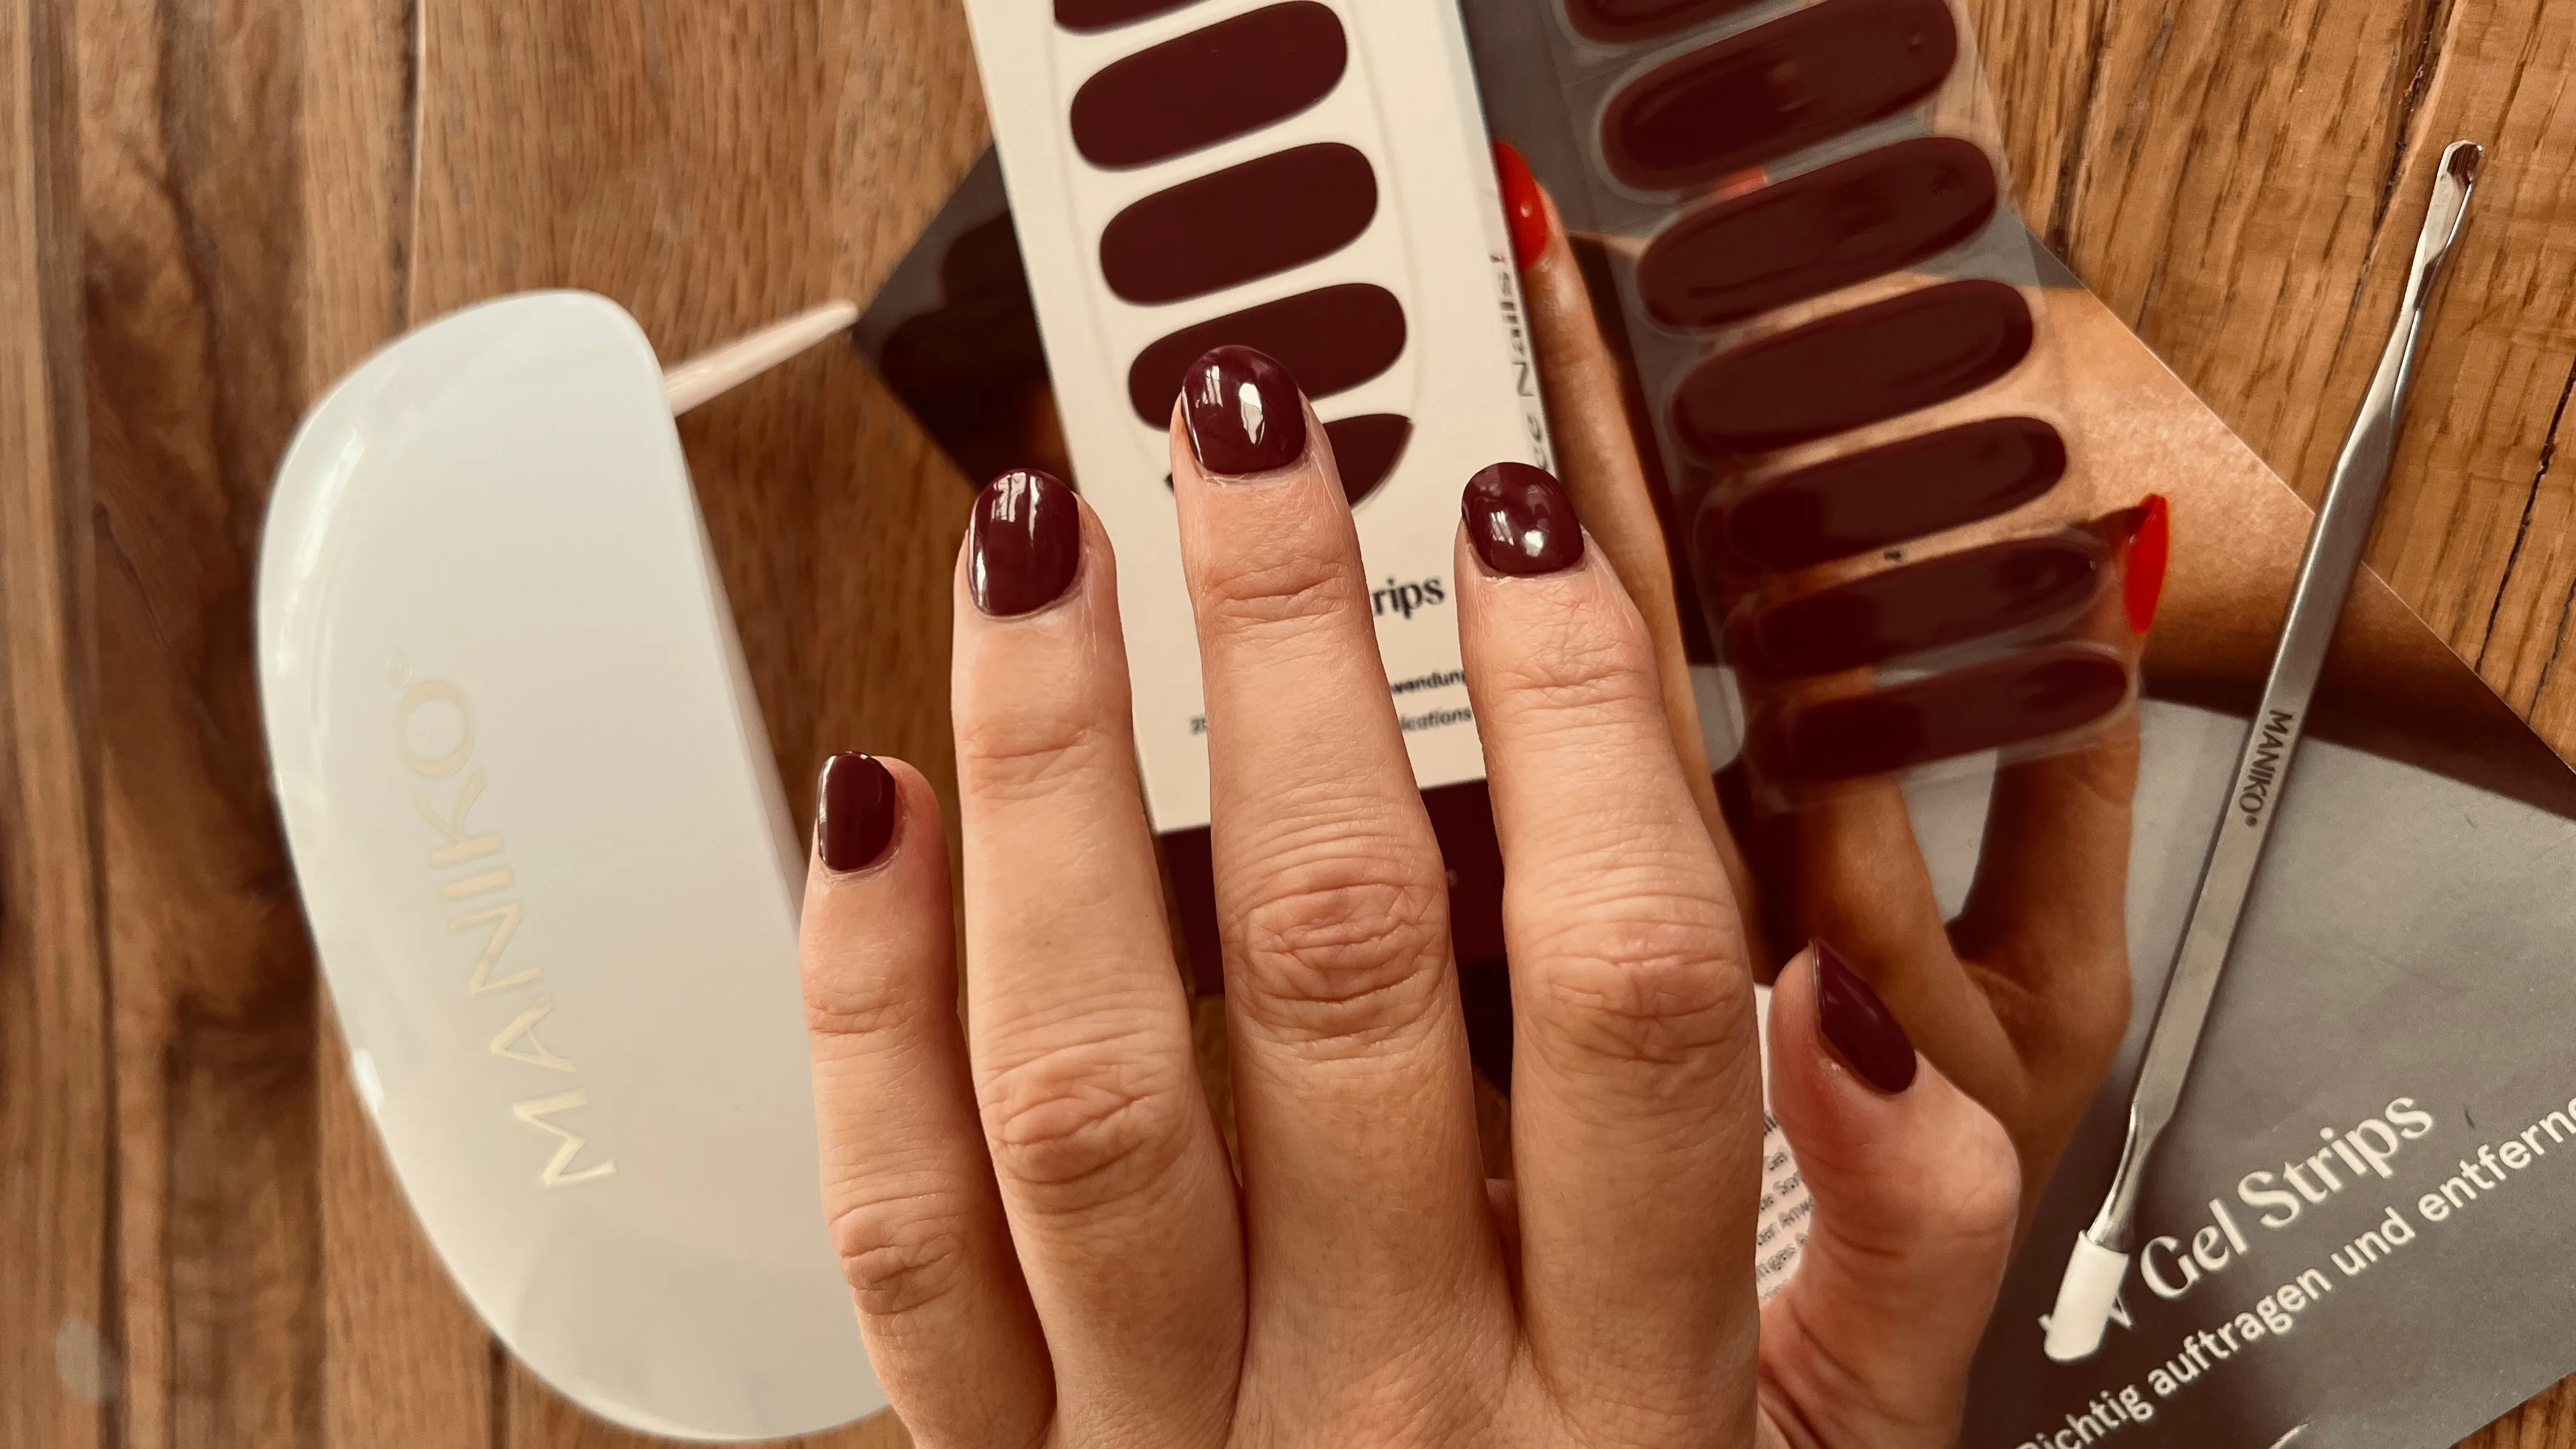
The result: simply great! Everything was really neat – as if a professional was at work. I actually didn't think so. I'm currently wearing the nails for the seventh day and they still hold up and shine really nicely. Nothing has peeled off, a small scratch on my thumbnail is hardly noticeable.
By the way:My fingernails aren't particularly long. That's why one Maniko Nails pack (contains 20 nail strips) is enough for me not just for 2, but for 4 manicures because I can split the strips.
How are Maniko nail strips removed?
According to the manufacturer, removing the UV gel strips is as easy as removing conventional nail polish. How does it work exactly? Maniko has a special “Remover Serum” or the so-called “Magic Remover Pen”. These products are intended to loosen the adhesive layer between the UV gel strips and the nails.
To do this, simply put some remover liquid on a cotton pad, place the pad on the nail and wait a short moment. Then you should wipe your nail with light pressure and in circular movements until the top layer of color is dissolved. You should then be able to easily wipe the nail foil off the nail.
I used the Magic Remover Pen to remove the strips. I first used the pen to wet the edges of my nails with the remover liquid. Then I carefully loosened or lifted the nail foils one by one using a cuticle pusher. In between, I kept using the pen and applying it between the nail surface and the strips so that they came off even better and easier.
What can I say? That worked great, was quick and easy. That really surprised me. My big fear beforehand was that my nails would now be damaged and appear thin and brittle. But no. I was able to easily remove any adhesive residue with nail polish remover and my nails are completely fine.
By the way, I removed my nail foils after 14 days. But not because they were scratched or chipped or no longer held up, but because my nails grew so much during this time that I personally no longer found it beautiful.
Nail oil strengthens the nails and protects the cuticles from drying out. Used regularly, your nails stay beautiful and supple.
The nail strips made of nail polish from Maniko are currently available in over 80 different color shades in the online shop. You can now also get a selection of the products in drugstores such as Rossmann, dm or budni.
Something important at the end:Since we tested the Maniko nail strips ourselves, we describe our personal experience with the beauty product in this article. Just because we are satisfied with this product, get along well with it and recommend it, doesn't mean that you have to get along with the UV gel strips as well as we do. In order to form your own opinion, it is always advisable to test products yourself.