
Table of contents
- Was sind Microgreens?
- Are Microgreens healthy?
- How do you use microgreens?
- Grow microgreens: easier than expected
Do you want to grow part of your food yourself? Have you ever grown cress yourself? Too boring?
Ever heard of Microgreens? Even if the name sounds very futuristic, young plants are very hidden behind it. Perfect for everyone who is too impatient for the big harvest in the garden. You can already harvest after 10 days!
And where does the name come from? Quite simply: "Micro" because they are tiny with the harvest, and "Greens" because it is a whole series of plants and herbs. In German, by the way, they also mean microgers, green cabbage or leaf green.
And what about these little plants? We'll tell you what Microgreens are, why they are so popular and how you can grow them yourself.
Was sind Microgreens?
Microgreens are basically nothing more than young, edible seedlings. Depending on the variety, they have two to three fine cotyledons (also called "Kotyledons") and are usually eaten at least one week, but more often two to three weeks after sowing.
The seeds are mostly scattered on earth or substrate. If the microgreens are then ready to be “harvested”, the shooters are cut off just above the earth's surface. The seed itself remains in the ground and can even drive out a second time. Many have already tried it with cress. But there is so much more choice.
Which microgreens are there?
Have you ever used cress on a piece of kitchen paper as children? Then you already had contact with Microgreens. Kresse is clearly one of the most famous varieties.
But there are also other plants that are for cultivation: sunflowers, kale, dill, red clover, mustard, lentils, radishes, spinach, broccoli, radish and many more!
Do not use these plants
Plants from the nightshade family are not suitable as microgrün. They contain solanine in their leaves, which on the one hand tastes uncomfortably bitter, but on the other hand is also weak toxic.So, finger away from tomatoes, eggplants and Co.!
The difference between sprouts and Microgreens
Sprouts and microgreens are the same shoe? Not really. Because even if both words are often used as synonyms, there are clear differences:
- Sprouts are eaten completely, i.e. with the roots and seed covers. It is different with the green cabbage: it is cut over the root, leaves and stems remain.
- Microgreens are sown on earth or substrate and usually need daylight. Sprouts, on the other hand, are pulled without earth or light.
- Sprouts are ready to be eaten after a few days. Microgrün takes at least 7 days, usually even longer.
Are Microgreens healthy?
So far so good. But what about the hype about the mini-plants: Is the health promise or is the so-called "superfood" more like a fad?
The answer in advance: Clearly, Microgreens are extremely healthy!
Many vitamins & minerals
Due to the early stage of their harvest and the germination process, the tiny plants contain many vitamins and minerals - often even more than the adult vegetables.
- This includes vitamin C, for example, which is important for the immune system and the connective tissue.
- B vitamins that benefit the nerves, and vitamin A, which is important for good skin, for example.
- On minerals, the plants contain calcium for the bones, iron for the blood and zinc, which, among other things, supports wound healing.
But that's not all! Secondary plant substances, i.e. vegetable color, fragrance and aroma substances, are also plentiful in the plants and give them their delicious taste.
The chlorophyll contained is also very healthy for our body and supports the intestine and blood formation. And even protein can be found in Microgreens. Not bad, right?
Small plant, great advantages
In addition to their many good properties for the human body, the plants have a lot more to offer. Because they are:
- Environmentally friendly because you can grow them all year round and do not have to transport far
- Even for beginners without any problems and quickly harvested
- Due to the different varieties in the taste
- Very cheap and uncomplicated in cultivation
- Space saving, as they can be stacked or grown in the style of a small raised bed
- Low -calorie raw food and yet really tasty
Low amounts of fiber
However, the germs have a clear disadvantage. If you compare them with adult plants and vegetables, they have significantly fewer fiber. That makes sense, because the small plants lack plant fibers.
But are extremely important for the human body. That means: Microgreens are wonderful to eat an additional portion of vitamins and minerals. However, vegetables should continue to be prioritized.
How do you use microgreens?
But what exactly can you do with the tiny plants? Depending on the variety, microgreens have a mild, spicy, sweet or sharp taste. They are therefore wonderful as an ingredient for salad, as specially on sandwiches and soups or even as a taste kick in smoothies.
However, you should make sure not to heat the plants, or to put your dishes shortly before serving. Because the heat is lost due to the heat.
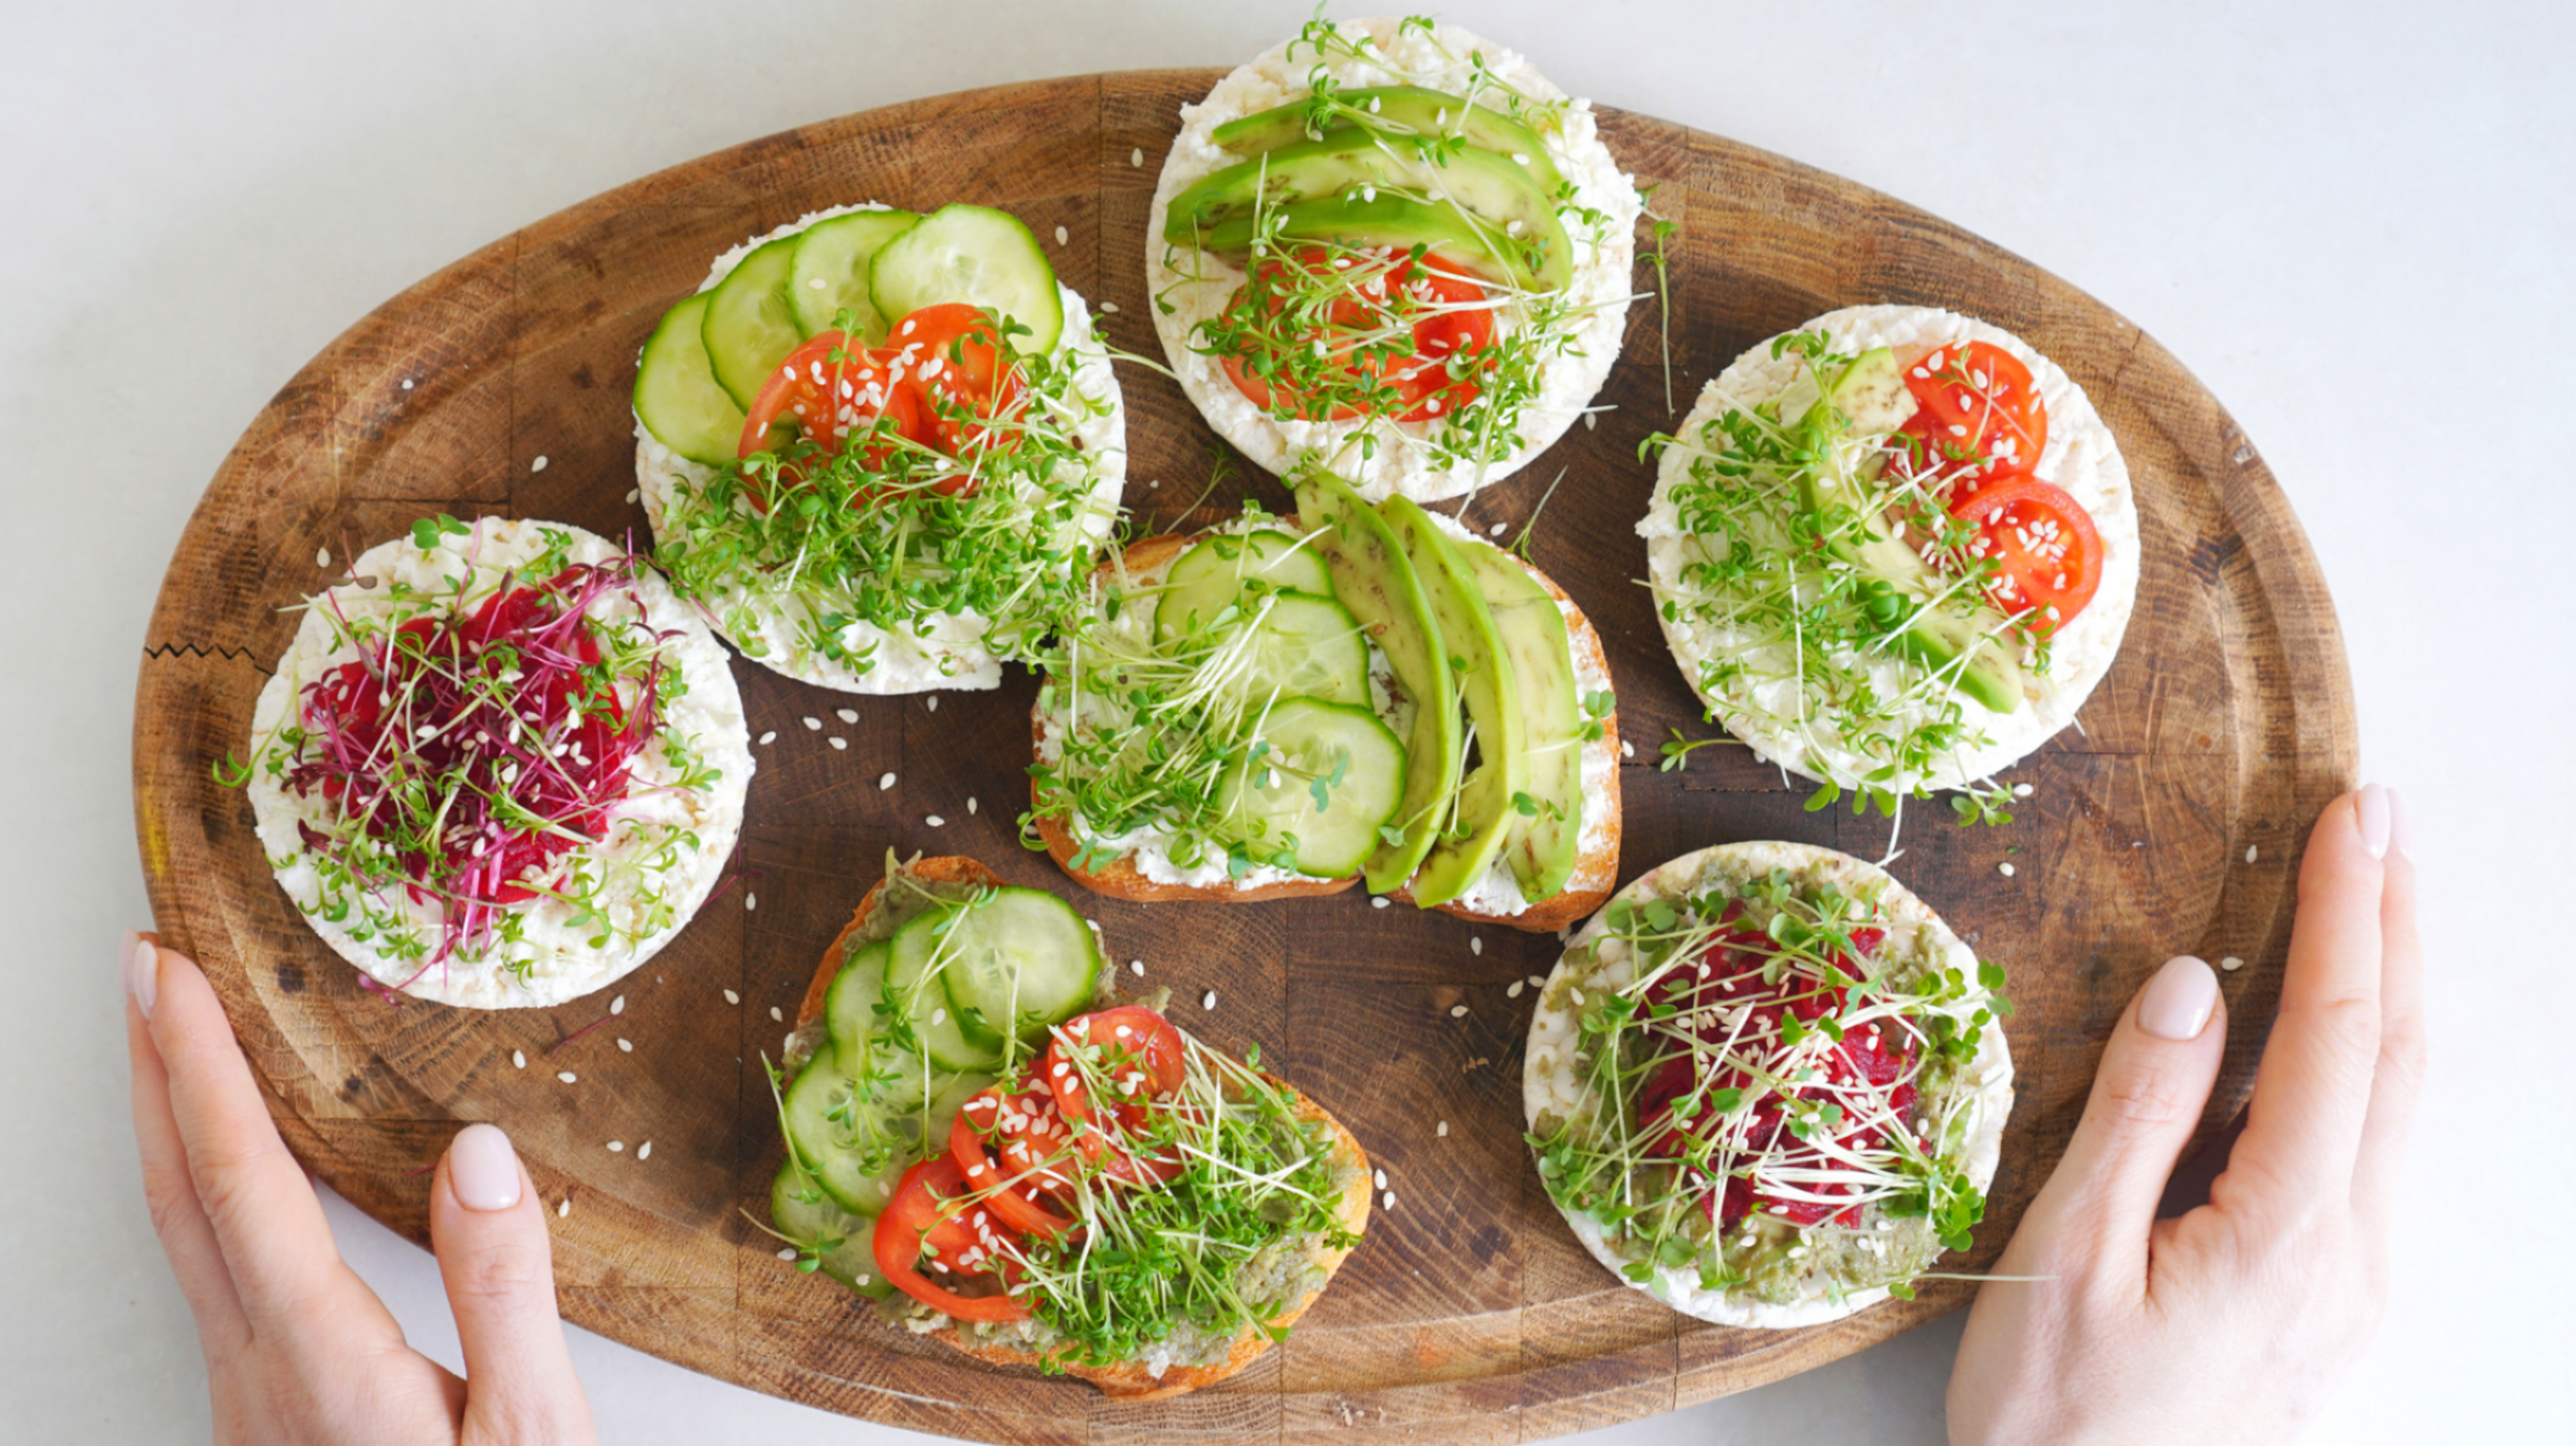
Inspiration for microgreen recipes
You would like to try Microgreens, but don't know where to start? No problem. Microgreens, for example, go on a variety of dishes.
Probably the best known variety, cress, can be used as a delicious topping for oursuse! Or you let our article about theinspire.
Book tip:You don't get enough of Microgreens? Then take a look at the "Superfood Assistant - Healthy Lifestyle with sprouts and Microgreens". In it you will find over 75 recipes!The book is available here on Amazon*.
Wash thoroughly before consumption
Especially when you have decided to eat packaged seedlings from the store, you should wash them carefully before you eat them. In addition, you have to consume them as quickly as possible. Because the plants can be affected with pathogens, such as salmonella or listeria.
But be careful: washing only helps a limited extent against these contaminants, for example if they have already entered the microgreens. So don't keep leaf green too long!
Pregnant, immuno -imposed people and small children should according to thatLower Saxony State Office for Consumer Protection and Food SafetyIncidentally, do without the raw germs.
Link tip for nature lovers
On our sister portalLureis about fun and enjoyment of gardening, plants and nature. Here you will find most important tips, tricks and instructions-regardless of whether you are a gardening beginner or a green thumb professional. ->Now drop by here!
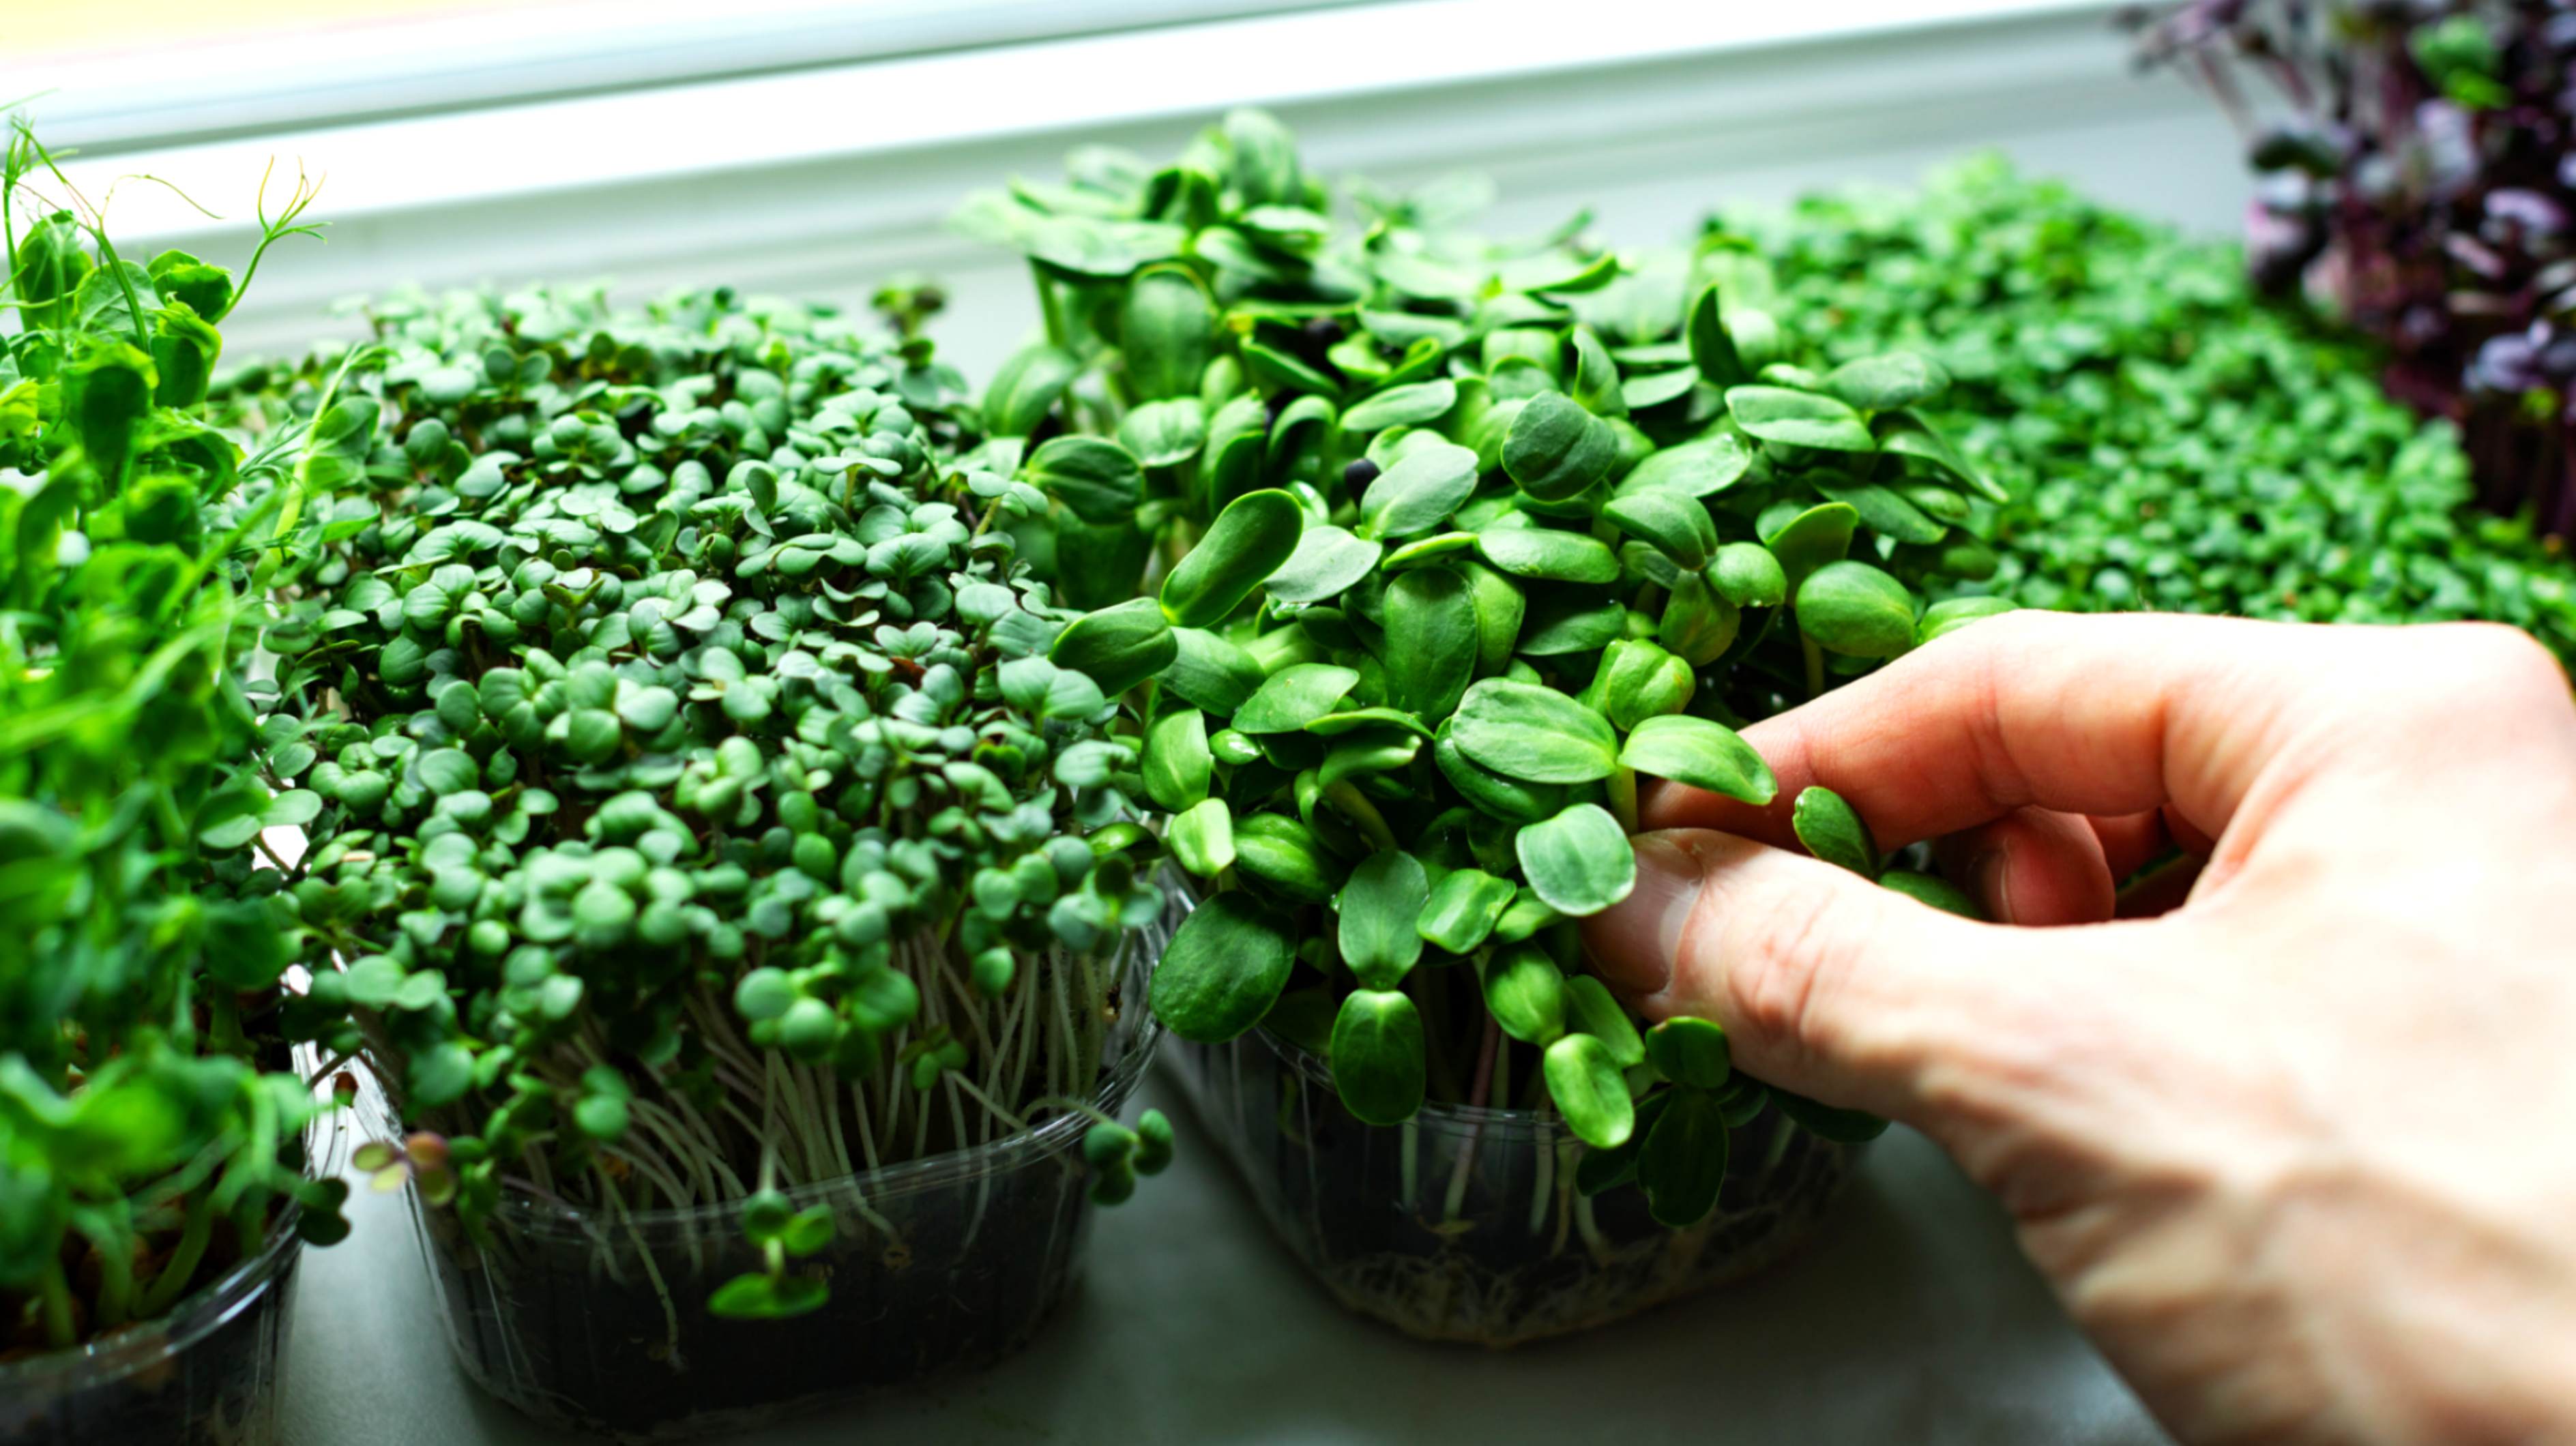
Grow microgreens: easier than expected
Of course you can simply buy the microgreens in the supermarket. However, this quickly becomes quite expensive, especially when you consider that the plants often go over the counter at small quantities at high prices.
It is much cheaper to grow them at home. Depending on the provider, the seeds for the seedlings cost a different number, but often start at a few euros. And best of all: it is not complicated to grow the plants!
Mini garden: There are to consider
Microgreens are not very big and also grow very quickly. This makes them wonderfully for cultivation in the home kitchen. But you should consider a few things:
The seeds
In order to prevent bacteria from breeding besides the microgreens, you should best use special seeds that have been treated in such a way that contaminants can be excluded. In addition, you ideally use organic seeds.
Tipp: You get a lot of microgreen seeds online with which nothing can go wrong.Here you will find a popular set with instructions on Amazon*.
The varieties
According to the online retailerMicrogreen-ShopPeas, radish, cabbage (such as broccoli or kale) or radishes particularly well. These varieties are easy to maintain and also succeed in newcomers.
And not to forget: the popular cress! It even grows on kitchen paper.
The location
The mini plants like it warm and bright, but you should avoid direct solar radiation. So your seeds can best germinate and grow into strong plants. Temperatures between 18 ° C and 22 ° C are optimal.
The harvest
After about 7-14 days (depending on the variety), your seedlings have reached a good height. Then you can harvest them. However, make sure that you cut them off briefly over the root. So the seedlings can grow back.
And that can be done so quickly:
At this point there is an external content from YouTube, which is recommended by our editorial team. It complements the article and can be displayed and hidden with one click.
I agree that this external content is displayed. Personal data can be transmitted to the provider of the content and third -party services.
Add microgrün: This is how you proceed
Super practical: Microgreens grow all year round, whether summer or winter. So you don't have to wait for spring to start your mini garden. And so it works:
1.Take breeding vessels of your choice at hand. These can be special cultivation trays, but also normal plant pots with drain holes and even coffee cups. Or you choose a germ or sprout glass.
2.Fill the growing bowl with soil. In theory, materials such as fleece or mats, but you will definitely get it everywhere.
3.Shave your seeds tightly. Since the plants do not become very large and you want as much yield as possible, this is necessary. You should also shop a lot of seeds.
4.Then you keep the earth moist, but not too wet - otherwise there is mold. The easiest way to do this is with a spray bottle. If the air humidity is very low, it can be worthwhile, an additional breeding hood (here on Amazon*) to use.
5.As soon as the Microgreens get 1-2 cotyledons, you can eat them. It is best not to get everything immediately. This increases the likelihood that shoots will grow back in the breeding vessel.
The shadow method
If you want a little longer stems for your seedlings, for example to make the harvest a little easier, then you can cover the seeds as soon as they are sprouted. After a few days, you remove the cover so that the plants do not stay pale.
Now you know everything you need to know about Microgreens and your sprouts! We wish you a lot of success in breeding and fun with the taste test. For more tips, tricks and practical everyday issuesover.